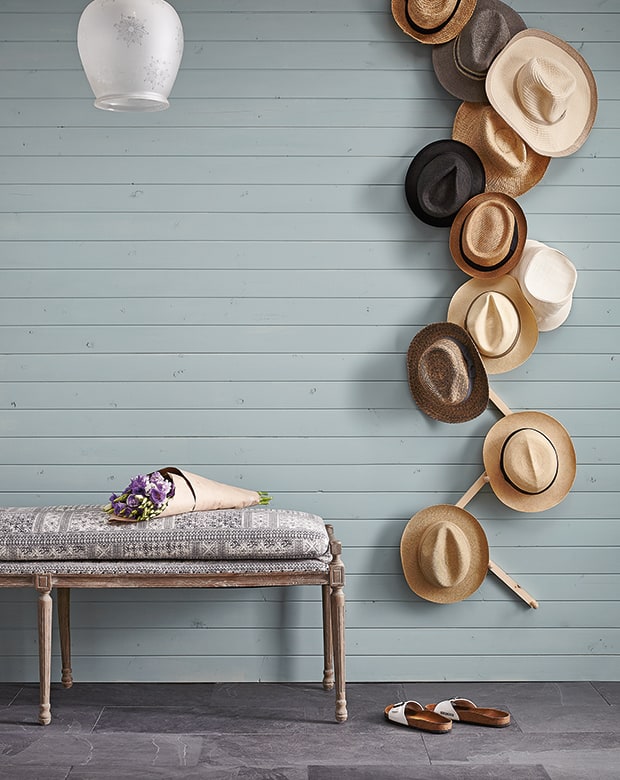
DIY Hat Rack: A Stylish And Functional Way To Organize Your Hats
So listen up, friends. If you're like me and have a growing collection of hats that just won't quit, you know how frustrating it can be to keep them organized. A DIY hat rack could be your ultimate solution! Not only does it help declutter your space, but it also adds a personal touch to your home decor. Imagine walking into your room and seeing all your favorite hats neatly displayed – it's like a little slice of heaven for hat lovers. Let me tell you, creating your own hat rack is easier than you think, and trust me, it's gonna be worth every second.
Now, before we dive into the nitty-gritty details, let's talk about why a DIY hat rack is such a game-changer. First off, it's customizable. You can design it to fit your personal style and the space you have available. Plus, it's a fun project that lets you unleash your creativity. Whether you're into rustic wooden designs or sleek modern looks, there's a hat rack out there for everyone. And the best part? You don't need to spend a fortune on expensive store-bought solutions.
Here's the deal: organizing your hats doesn't have to be a headache. With a DIY hat rack, you're not just solving a storage problem; you're turning it into an opportunity to express yourself. So grab your tools, gather your materials, and let's get started on this awesome project. By the end of this article, you'll have all the info you need to build your very own hat rack and make your space look like a pro-designed masterpiece.
Read also:Nicole Parker Fox Bikini The Ultimate Guide To Her Style Journey And Impact
Why DIY Hat Racks Are Worth It
Alright, let's break it down. Why should you bother with a DIY hat rack when you can just buy one? Well, my friend, there are plenty of reasons. First, building your own hat rack means you get to tailor it exactly to your needs. No more settling for something that's "good enough." You can choose the size, shape, and style that works best for you. Plus, it's a heck of a lot cheaper than buying a fancy pre-made rack from a store.
Here's another cool thing: making your own hat rack is a great way to learn some new skills. Whether you're a total beginner or a seasoned DIY pro, this project can teach you a thing or two about woodworking, design, and creativity. And let's not forget the satisfaction you'll feel when you see your finished product. There's nothing quite like the pride of knowing you made something with your own two hands.
Cost-Effective and Stylish
Let's talk numbers for a sec. A store-bought hat rack can easily set you back $50 or more, depending on the quality and design. But with a DIY hat rack, you can create something just as stylish for a fraction of the cost. All you need is some basic materials and a bit of elbow grease. And hey, if you're handy with tools, you might even be able to repurpose stuff you already have lying around the house. Score!
Also, let's not underestimate the power of personalization. When you build your own hat rack, you can choose materials and finishes that match your home's aesthetic. Whether you're into vintage charm, industrial chic, or boho vibes, there's no limit to what you can create. Plus, it's a conversation starter – trust me, your friends are gonna be impressed when they see your handiwork.
Getting Started: Materials and Tools
Now that we've established why DIY hat racks rock, let's talk about what you'll need to get started. First things first, you're gonna need some materials. Depending on the design you choose, this could include wood, metal pipes, or even repurposed items like coat hangers or branches. The possibilities are endless!
As for tools, you'll probably need a saw, a drill, sandpaper, and maybe even a hammer and nails if you're going the wooden route. Don't worry if you're not a pro carpenter – most of these tools are pretty easy to use, and there are tons of tutorials online if you need a little extra guidance. Just remember to wear safety gear – we don't want any accidental injuries while you're crafting your masterpiece!
Read also:Chapman And Kirby Photos A Deep Dive Into Their Iconic Masterpieces
Choosing the Right Materials
When it comes to materials, there are a few things to keep in mind. If you're going for a rustic look, consider using reclaimed wood or wooden dowels. For a more modern vibe, metal pipes or rods might be the way to go. And if you're feeling adventurous, you could even try using natural branches for a bohemian touch. The key is to choose materials that not only look good but are also sturdy enough to hold your hats.
Here's a quick list of materials you might need:
- Wooden boards or dowels
- Metal pipes or rods
- Natural branches
- Screws and nails
- Paint or stain (optional)
Remember, the materials you choose will affect the overall look and durability of your hat rack, so take your time and pick something that fits your vision.
Design Ideas for Your DIY Hat Rack
So you've got your materials and tools ready – now it's time to think about design. There are tons of creative ways to build a hat rack, and the best part is, you can mix and match different elements to create something truly unique. Here are a few ideas to get your creative juices flowing:
Rustic Wooden Hat Rack
If you're into that cozy farmhouse vibe, a rustic wooden hat rack is the way to go. You can use reclaimed wood or pick up some fresh planks from your local hardware store. Sand them down, stain them to your desired color, and attach hooks or dowels for your hats. It's simple, stylish, and oh-so-chic.
Industrial Metal Hat Rack
For those who love a more urban, edgy look, consider going for an industrial metal hat rack. Metal pipes and brackets can be arranged in a variety of ways to create a sturdy and sleek design. Plus, the metallic finish adds a modern touch that works well in almost any space.
Boho Branch Hat Rack
Feeling a bit bohemian? Why not try using natural branches to create a one-of-a-kind hat rack? You can attach the branches to a wooden board or directly to the wall for a super organic look. This option is not only eco-friendly but also adds a touch of nature to your home.
Step-by-Step Guide to Building Your Hat Rack
Alright, let's get down to business. Here's a step-by-step guide to help you build your very own DIY hat rack:
Step 1: Plan Your Design
Before you start cutting and drilling, take some time to plan out your design. Sketch it out on paper or use a design app if you're feeling tech-savvy. Think about the size, shape, and placement of your hat rack. Will it hang on the wall? Sit on the floor? These are important questions to answer before you start working.
Step 2: Gather Your Materials and Tools
Once you have a clear idea of what you want, gather all your materials and tools. Double-check that you have everything you need, including safety gear like gloves and goggles. Trust me, you don't want to be halfway through your project and realize you're missing a crucial piece.
Step 3: Cut and Sand Your Materials
Now it's time to get your hands dirty. If you're using wood, cut it to the desired length and sand it down until it's smooth to the touch. If you're using metal, clean it thoroughly and check for any sharp edges that need to be filed down.
Step 4: Assemble Your Hat Rack
With your materials prepped, it's time to assemble your hat rack. Follow your design plan and start attaching pieces together. Use screws, nails, or brackets to secure everything in place. Make sure everything is level and sturdy before moving on to the next step.
Step 5: Add Finishing Touches
Once your hat rack is assembled, it's time to add those finishing touches. Sand any rough edges, apply paint or stain if desired, and attach hooks or dowels for your hats. Step back and admire your handiwork – you've officially created a DIY hat rack!
Tips and Tricks for a Successful DIY Project
Building a DIY hat rack can be a lot of fun, but there are a few tips and tricks to keep in mind to ensure success:
- Measure twice, cut once – this old adage is true for a reason!
- Use high-quality materials for durability and longevity.
- Take breaks if you're feeling overwhelmed – rushing can lead to mistakes.
- Ask for help if you're unsure about a particular step – there's no shame in seeking advice.
And remember, perfection isn't always the goal. Sometimes, the little imperfections are what make a DIY project truly special.
Maintaining Your DIY Hat Rack
Now that you've built your hat rack, it's important to take care of it so it lasts for years to come. Depending on the materials you used, you might need to clean or touch up your hat rack periodically. For wooden racks, a simple dusting with a soft cloth should do the trick. Metal racks might require occasional polishing to keep them looking shiny and new.
Repairs and Upgrades
If you notice any wear and tear on your hat rack, don't hesitate to make repairs. A little bit of sanding, painting, or tightening of screws can go a long way in extending its lifespan. And if you're feeling adventurous, you can always upgrade your hat rack by adding new hooks, changing the color, or even expanding its size.
Conclusion
So there you have it, folks – everything you need to know about building your very own DIY hat rack. From choosing materials to assembling your masterpiece, this project is a fun and rewarding way to organize your hats and spruce up your space. Remember, the key is to have fun and let your creativity shine.
Now, here's the deal: if you've enjoyed this article and found it helpful, I'd love to hear from you. Leave a comment below and let me know what you think. And hey, if you've built your own DIY hat rack, share a picture – I'd love to see it! Also, don't forget to check out our other articles for more DIY inspiration and tips. Happy crafting, and see you next time!
Table of Contents
- Why DIY Hat Racks Are Worth It
- Getting Started: Materials and Tools
- Choosing the Right Materials
- Design Ideas for Your DIY Hat Rack
- Rustic Wooden Hat Rack
- Industrial Metal Hat Rack
- Boho Branch Hat Rack
- Step-by-Step Guide to Building Your Hat Rack
- Tips and Tricks for a Successful DIY Project
- Maintaining Your DIY Hat Rack
Smilez And Southstar: The Dynamic Duo Redefining Music And Culture
Fake Phone Call Kamala: The Inside Story You Need To Know
Iris Cafe Brooklyn Heights: Your Ultimate Coffee Haven

Wood Cap Display Wall Rack holds up to 30 hats Wall hats, Diy hat

17+ Unique and Cool Hat Rack Ideas, Check It Out! Tags cowboy hat rack
Hang Em' Up With These 15 DIY Hat Racks
